
Drywall Installation & Repair in Paradise Valley, AZ

Luxury drywall scope across Paradise Valley — Level 5 finish, radius walls, sound-rated assemblies.

Serving Paradise Valley & nearby Maricopa County

Get Your Free Drywall Installation & Repair Estimate

Step 1 of 5Project

What kind of project?

Pick the option that fits best — you can add details next.

Quick Answer

ProWorx Restoration provides luxury drywall installation across Paradise Valley, AZ — Level 5 skim coats, radius and barrel-vault framing, theater QuietRock assemblies, custom-home hangs, and remodel patch work. Typical projects run $3,500–$60,000 and 4–22 days.

1,200+

Projects Completed

15+

Years Experience

ROC #349454

Licensed & Insured

100%

Satisfaction Guaranteed

Drywall Installation & Repair Built for Paradise Valley Homes
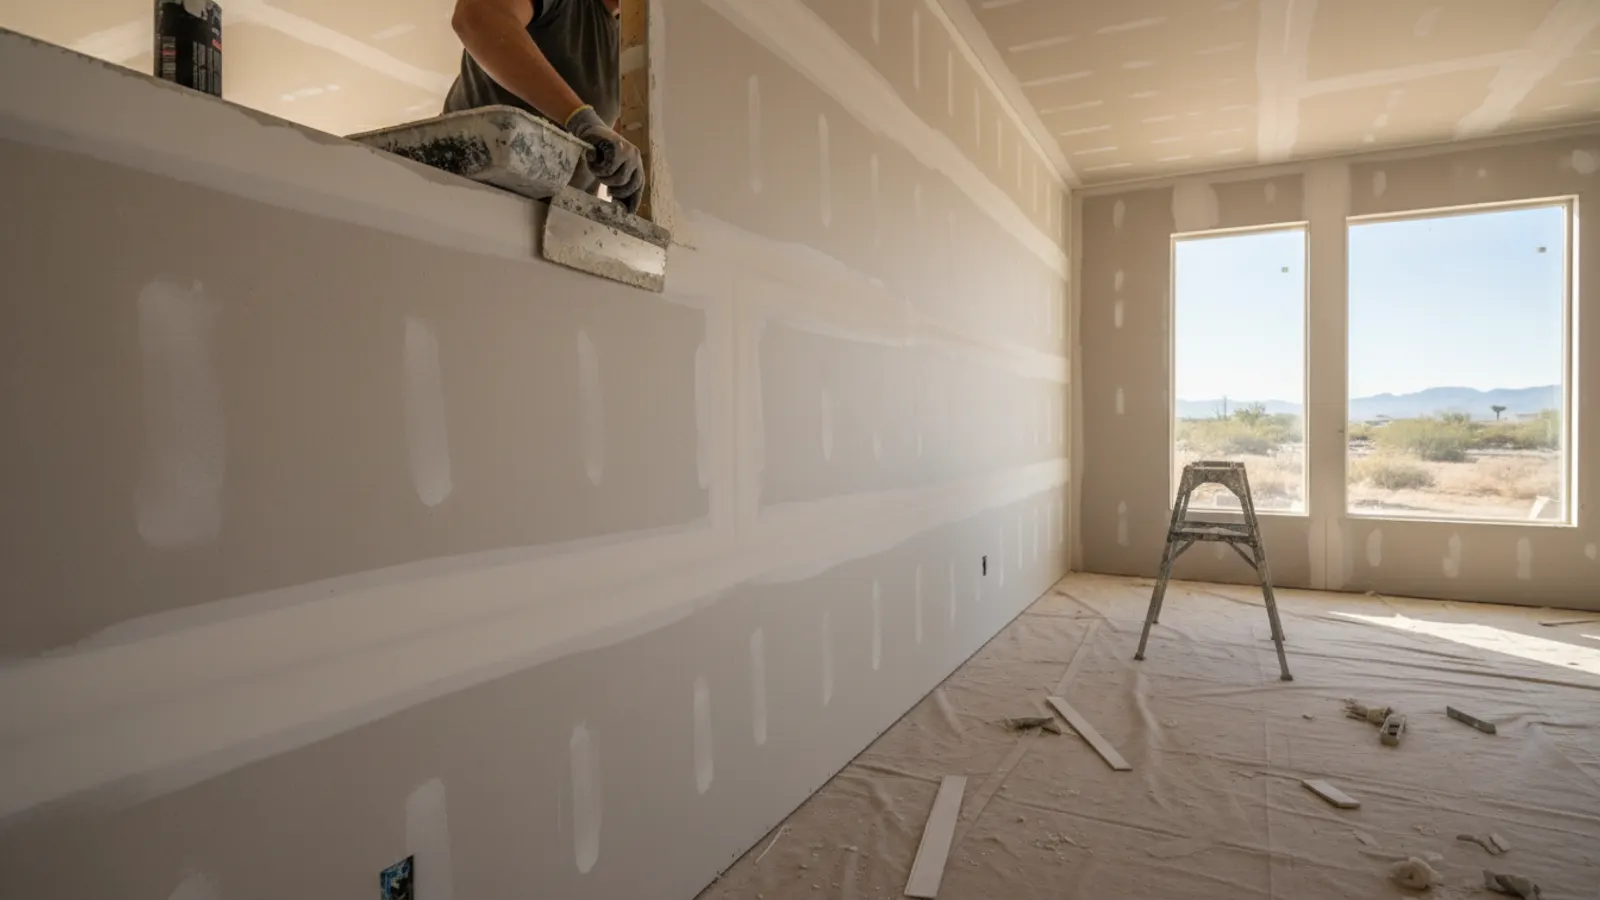
Drywall being hung and joint compound smoothed across the seams in a Paradise Valley, Arizona home
Paradise Valley is the metro's most demanding finish market — Level 5 skim coat is baseline scope, curved walls and arched openings are routine, and theater / primary-suite QuietRock assemblies are standard on new builds and major remodels.
Town Hillside Ordinance scopes require careful HOA-style review on any visible alteration tied to drywall work (window changes, opening expansions).
Insurance patch work (slab leak, monsoon roof leak, electrical fire) is scoped in Xactimate with direct carrier billing.

Why Paradise Valley Drywall Installation & Repair Is Different

Level 5 skim coat is baseline; Level 4 won't hold up under designer cove lighting and large picture windows.
Town of Paradise Valley hillside ordinance triggers extended review on exterior-visible alterations.
Theater and primary-suite QuietRock assemblies are common scope on new builds.

Recent Drywall Installation & Repair Projects in Paradise Valley

Camelback Country Club Estates

Whole-home Level 5 skim, 5,800 sq ft, smooth-finish throughout, prime + paint

$58K21 days

Cheney Estates

Theater room: staggered-stud, QuietRock + Green Glue, Level 5 skim, 380 sq ft

$22K10 days

Tatum Foothills

Great-room curved-wall framing + barrel-vault hang + Level 5 finish, 1,200 sq ft

$28K14 days

Drywall Installation & Repair in Paradise Valley: Fast Facts

Level 5 skim coat: standard scope on every Paradise Valley remodel.

Curved-wall / barrel-vault framing: ~30% of volume.

Theater + primary-suite QuietRock assemblies: ~25%.

Average Paradise Valley drywall project: $8,000–$45,000.

Town hillside review: 4–6 weeks on visible exterior alterations.

Typical Cost

$300 – $8,000+

Typical Timeline

1 day – 2 weeks

Permit Lead Time

2–4 weeks

How We Approach Drywall Installation & Repair

ProWorx Restoration installs and repairs drywall on new construction, additions, remodels, and damage restoration across the Phoenix metro. We hang, tape, float, prime, and texture — orange-peel, knockdown, skip-trowel, smooth, or custom — and match existing finishes invisibly in raking light. Arizona ROC #349454.
Two Phoenix-metro realities drive most drywall work. First, texture matching: orange-peel and knockdown are the dominant tract-home textures and they must be reproduced with calibrated air-driven texture guns, not roller-stipple or aerosol cans, or the patch shows forever. Second, moisture: monsoon ceiling leaks, slab leaks, AC condensate failures, and bathroom over-spray all damage drywall paper face, requiring full-sheet replacement once moisture migrates past the paper.

New drywall installation: 1/2" walls, 5/8" Type X ceilings and garage assemblies

Repair and patch from small holes to full-sheet replacement

Texture matching: orange-peel, knockdown, skip-trowel, smooth, Santa Fe

Level 4 finish standard; Level 5 skim coat for critical lighting and gloss paints

Water-damaged drywall removal, mold-safe handling, and seamless replacement

Moisture- and mold-resistant board (purple board) in wet areas

What Paradise Valley Homeowners Should Know About Drywall Installation & Repair

Materials & Standards We Use

Installation per GA-216 (Gypsum Association Application & Finishing). Sheet sizes: 1/2" regular for walls, 5/8" Type X for ceilings and garage walls per IRC fire requirements. Joint compound: setting-type for first two coats, lightweight all-purpose for finish coat. Tape: paper for tapered joints, fiberglass mesh only on small patches. Finish levels per GA-214 — Level 4 standard, Level 5 skim coat for areas with critical light or semi-gloss/gloss paint. All work warrantied under ROC #349454.

Preserving Character While Updating

Interior restoration often involves balancing preservation with modern needs. Updating lighting, electrical and plumbing while preserving original features such as trim, doors and built-ins allows a home to function well today while retaining its character.

Doors and Hardware

Interior doors may sag, stick, warp or suffer damage over time. Adjusting hinges, planing edges, repairing panels and refinishing surfaces can restore their function and appearance. Original hardware can often be cleaned and restored, preserving period details in older homes.

Installing Drywall on Ceilings

Ceiling drywall is heavier and more difficult to install than wall drywall, and it is more prone to sagging over time if fastened incorrectly. Using the correct thickness, fastener spacing and framing support ensures ceilings remain flat. Ceilings are typically hung before walls so wall panels support the ceiling edges, creating stronger corners.

Drywall Thickness

Drywall is available in several thicknesses. Thicker panels resist sagging on ceilings, provide better sound control and are used in fire-rated assemblies. Thinner panels may be used for curved walls or overlays. The appropriate thickness depends on the location and code requirements.

Cracks at Corners and Seams

Cracks often appear at inside corners, along seams or above doors and windows where movement concentrates. Some cracking is caused by normal settling, while recurring cracks may indicate structural movement or improper installation. Properly repairing and reinforcing seams helps prevent recurrence.

Moisture-Resistant Board in Humid Areas

Laundry rooms, bathrooms and areas near water heaters benefit from moisture-resistant drywall, which better tolerates humidity than standard board. It is not waterproof, however, and should not be used as a tile backer in showers or tub surrounds, where cement board or another approved backer is required to protect the wall assembly.

Repairing Plaster Walls

Older homes may have plaster walls rather than drywall. Plaster is harder and more durable than drywall, but it can crack, loosen from its lath or suffer water damage. Repairs require techniques and materials compatible with the original, and skilled plasterers can often repair damaged areas so they blend with surrounding walls.

Restoring Trim and Millwork

Original baseboards, door casings, crown moulding and built-ins contribute greatly to a home's character. Damaged sections can often be repaired, and missing pieces can be custom milled to match existing profiles. Preserving original millwork maintains the home's authenticity and is often preferable to replacing it with modern alternatives.

Wall Textures in Arizona Homes

Many Arizona homes feature textured walls rather than smooth finishes. Knockdown and orange peel textures are common, and they help disguise minor imperfections. Matching existing textures during repairs requires skill and experience.

Restoring Ceilings

Ceilings can suffer from water stains, cracks, sagging and damaged texture. Repairs range from stain-blocking primer and repainting to replacing damaged sections and matching texture. In older homes, ceiling texture may need testing for asbestos before it is disturbed. Restoring ceilings properly ensures repairs are invisible and the room looks complete.

Cabinet and Built-In Repair

Cabinets and built-ins damaged by water, wear or age can frequently be repaired rather than replaced. Swollen panels, loose joints, damaged finishes and worn hardware can be restored, and refinishing can refresh their appearance. Repairing quality built-ins preserves craftsmanship that would be expensive to replicate.

Our Interior Restoration Process in Arizona

We open with scope walk and photo documentation, especially on insurance work. For water and mold scope we verify moisture levels are dry and pass post-remediation criteria before reconstruction. Drywall is replaced in full sheets where damage warrants, then taped, floated, primed, and textured to match — orange-peel and knockdown matched with calibrated texture guns, not roller-stipple. Paint is sprayed wall-to-corner when possible to avoid roller-stipple mismatch. Flooring, trim, and fixtures follow, then a punch walk with the homeowner or adjuster. Single-room scope: 1–2 weeks. Whole-home: 4–10 weeks depending on extent.

Our Proven Process

01

Free Consultation

We visit your property, discuss your goals, and provide a detailed, no-obligation estimate.

02

Custom Plan

Our team creates a tailored project plan with timeline, materials, and transparent pricing.

03

Expert Execution

Licensed craftsmen complete your project with quality materials and meticulous attention to detail.

04

Final Walkthrough

We inspect every detail with you and ensure complete satisfaction before the job is done.

"Level 5 throughout 5,800 sq ft — under the chandeliers and cove lighting, walls look like cabinetry. Highest standard we've ever had."

ProWorx Client · Paradise Valley

Neighborhoods We Serve in Paradise Valley

Camelback Country Club Estates · Cheney Estates · Tatum Foothills · Mummy Mountain · Casa Blanca Estates · Doubletree Estates

Drywall Installation & Repair FAQs for Paradise Valley Homeowners

Ready to Start Your Paradise Valley Drywall Installation & Repair Project?

Get a free, no-obligation estimate from a licensed Arizona contractor — ROC #349454.