
Drywall Installation & Repair in Scottsdale, AZ

Luxury drywall scope across Scottsdale — Level 5 skims, radius walls, QuietRock assemblies.

Serving Scottsdale & nearby Maricopa County

Get Your Free Drywall Installation & Repair Estimate

Step 1 of 5Project

What kind of project?

Pick the option that fits best — you can add details next.

Quick Answer: Drywall Installation & Repair in Scottsdale

ProWorx Restoration provides high-end drywall installation across Scottsdale, AZ — Level 5 skim-coat finishes, radius and barrel-vault framing, QuietRock soundproof assemblies, and remodel patch work in DC Ranch, Silverleaf, Troon, and Old Town. Typical projects run $2,500–$45,000 and 3–18 days.

1,200+

Projects Completed

15+

Years Experience

ROC #349454

Licensed & Insured

100%

Satisfaction Guaranteed

Drywall Installation & Repair Built for Scottsdale Homes
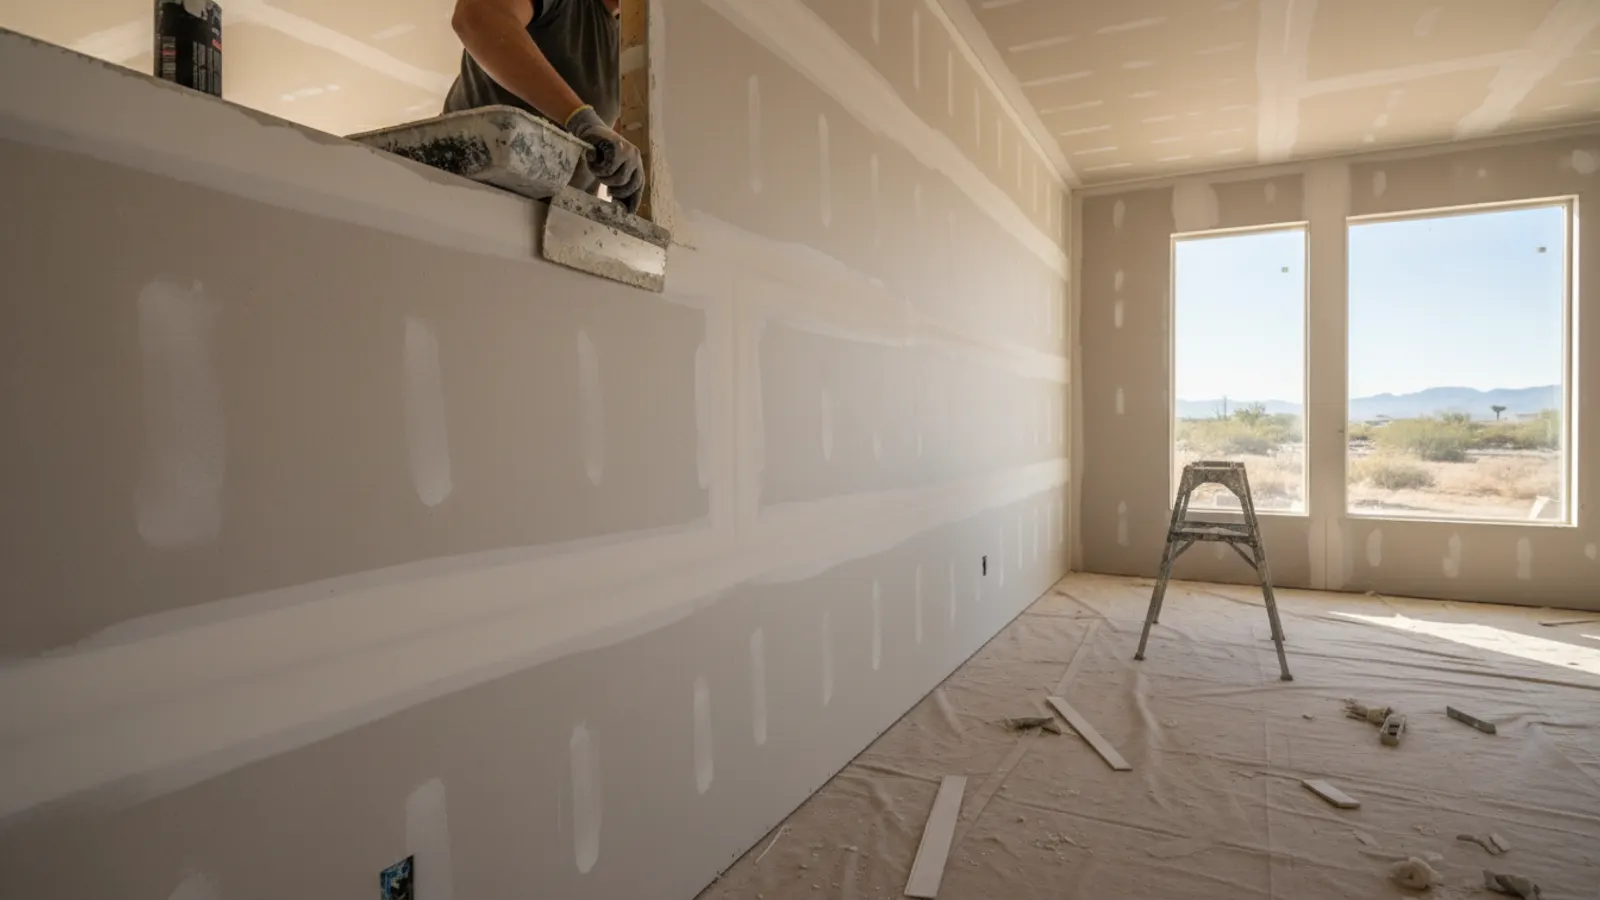
Drywall being hung and joint compound smoothed across the seams in a Scottsdale, Arizona home
Scottsdale's luxury market expects Level 5 finish as a baseline — anything less shows under designer lighting. We run dedicated finish crews for the north Scottsdale market (DC Ranch, Silverleaf, Estancia, Troon) and coordinate with HOA design review boards on any work that triggers exterior or window changes.
Old Town remodel work runs the opposite direction — mid-century ranch patch, popcorn removal, and 1960s plaster replacement. We carry asbestos pre-test on every pre-1980 scrape.
Curved walls, barrel vaults, and arched openings are routine here; we frame and skim on a single bid.

Why Scottsdale Drywall Installation & Repair Is Different

Silverleaf, DC Ranch, and Estancia design review boards require submittals on visible alterations — we manage HOA paperwork as part of intake.
City of Scottsdale Planning Services permits structural-wall and fire-assembly work in 2–3 weeks.

Recent Drywall Installation & Repair Projects in Scottsdale

Silverleaf

Great-room remodel: barrel-vault framing, Level 5 skim, smooth finish, 1,200 sq ft scope

$22K11 days

Old Town Scottsdale

Mid-century ranch popcorn removal + plaster patch, asbestos-tested negative, smooth re-finish

$9.4K7 days

Troon North

Theater room QuietRock + Green Glue assembly, Level 5 skim, 320 sq ft

$14K8 days

Drywall Installation & Repair in Scottsdale: Fast Facts

Level 5 finish is baseline scope on Silverleaf / DC Ranch / Estancia remodels.

Curved-wall and barrel-vault work: ~15% of north Scottsdale volume.

QuietRock theater and primary-suite assemblies: rising demand.

Average Scottsdale drywall project: $4,500–$30,000.

Asbestos pre-test on every pre-1980 Old Town popcorn scrape.

Typical Cost

$300 – $8,000+

Typical Timeline

1 day – 2 weeks

Permit Lead Time

2–4 weeks

How We Approach Drywall Installation & Repair

ProWorx Restoration installs and repairs drywall on new construction, additions, remodels, and damage restoration across the Phoenix metro. We hang, tape, float, prime, and texture — orange-peel, knockdown, skip-trowel, smooth, or custom — and match existing finishes invisibly in raking light. Arizona ROC #349454.
Two Phoenix-metro realities drive most drywall work. First, texture matching: orange-peel and knockdown are the dominant tract-home textures and they must be reproduced with calibrated air-driven texture guns, not roller-stipple or aerosol cans, or the patch shows forever. Second, moisture: monsoon ceiling leaks, slab leaks, AC condensate failures, and bathroom over-spray all damage drywall paper face, requiring full-sheet replacement once moisture migrates past the paper.

New drywall installation: 1/2" walls, 5/8" Type X ceilings and garage assemblies

Repair and patch from small holes to full-sheet replacement

Texture matching: orange-peel, knockdown, skip-trowel, smooth, Santa Fe

Level 4 finish standard; Level 5 skim coat for critical lighting and gloss paints

Water-damaged drywall removal, mold-safe handling, and seamless replacement

Moisture- and mold-resistant board (purple board) in wet areas

What Scottsdale Homeowners Should Know About Drywall Installation & Repair

Repairing Plaster Walls

Older homes may have plaster walls rather than drywall. Plaster is harder and more durable than drywall, but it can crack, loosen from its lath or suffer water damage. Repairs require techniques and materials compatible with the original, and skilled plasterers can often repair damaged areas so they blend with surrounding walls.

Our Interior Restoration Process in Arizona

We open with scope walk and photo documentation, especially on insurance work. For water and mold scope we verify moisture levels are dry and pass post-remediation criteria before reconstruction. Drywall is replaced in full sheets where damage warrants, then taped, floated, primed, and textured to match — orange-peel and knockdown matched with calibrated texture guns, not roller-stipple. Paint is sprayed wall-to-corner when possible to avoid roller-stipple mismatch. Flooring, trim, and fixtures follow, then a punch walk with the homeowner or adjuster. Single-room scope: 1–2 weeks. Whole-home: 4–10 weeks depending on extent.

Patching Holes and Damage

Small holes from nails or minor impacts can be filled and sanded, while larger holes require a drywall patch secured to backing or framing. Proper patching techniques ensure repairs are strong and invisible after texturing and painting.

Interior Restoration for Rental Properties

Rental properties often need interior restoration between tenants. Repairing wall damage, refinishing floors, repainting and updating worn fixtures prepares the unit for new occupants quickly. Durable finishes chosen during restoration reduce future turnover costs.

Common Drywall Issues in Phoenix-Metro Homes

Texture mismatch is the #1 failure on amateur work — raking light from low-angle Arizona afternoon sun makes every imperfect patch visible. Nail and screw pops are common on 1990s–2000s tract homes from seasonal humidity swings; we re-secure and refinish. Water-stained ceilings from monsoon leaks or upstairs bathroom failures need full-sheet replacement once paper face is compromised — surface paint over a wet stain re-bleeds within weeks. Bathroom drywall around showers should be moisture-resistant board (purple board), not standard sheetrock; replacing with the right material prevents future mold.

Planning Interior Restoration

A careful assessment of interior conditions helps prioritise repairs and identify features worth preserving. Clear planning ensures work proceeds efficiently and that restoration enhances the home rather than erasing its original details.

Corner Bead

Outside corners are protected with corner bead, which creates a straight edge and resists impact damage. Damaged or dented corner bead can be replaced or repaired to restore a clean edge.

The Restoration Sequence

Interior restoration follows a logical order to avoid damaging finished work. Structural and system repairs come first, followed by walls and ceilings, then cabinetry and trim, then flooring and painting, and finally fixtures and hardware. Coordinating the sequence protects completed surfaces and keeps the project efficient.

Drywall in Additions and Remodels

In additions and remodels, new drywall must blend with existing walls. Matching thickness at transitions, feathering joints carefully and replicating the existing texture ensure new walls look continuous with the rest of the home rather than standing out as obvious new work.

Cabinet and Built-In Repair

Cabinets and built-ins damaged by water, wear or age can frequently be repaired rather than replaced. Swollen panels, loose joints, damaged finishes and worn hardware can be restored, and refinishing can refresh their appearance. Repairing quality built-ins preserves craftsmanship that would be expensive to replicate.

Nail Pops and Screw Pops

Small bumps or circles appearing on walls and ceilings are often caused by fasteners working loose as framing shrinks or moves. Resetting the fastener, adding a new one nearby and refinishing the area usually resolves the problem.

Our Drywall Installation Process in Arizona

Hang sequence starts with ceilings, then walls top-to-bottom with butt joints staggered. Fastener spacing per GA-216 — 16" OC on ceilings, 16"–24" OC on walls. All joints taped with paper tape (not mesh on butt joints) bedded in setting-type mud. Three coats minimum, sanded between coats. Primer is shellac-based for any smoke- or water-stained substrate and PVA elsewhere. Texture is applied with calibrated hopper or air-driven gun — we test on cardboard against your existing wall sample to dial in match before spraying. Single-room scope: 3–5 days. Whole-home or full reconstruction: 2–4 weeks.

How Our Drywall Installation & Repair Process Works in Scottsdale

01

Free On-Site Consultation

We visit your property, discuss your goals, and provide a detailed, no-obligation estimate.

02

Custom Project Plan

Our team creates a tailored project plan with timeline, materials, and transparent pricing.

03

Licensed Crews On Site

Licensed craftsmen complete your project with quality materials and meticulous attention to detail.

04

Final Walkthrough & Sign-Off

We inspect every detail with you and ensure complete satisfaction before the job is done.

"Built our theater with QuietRock and Green Glue — bass doesn't leave the room. Level 5 finish throughout the great room is flawless."

ProWorx Client · Scottsdale

Neighborhoods We Serve in Scottsdale

DC Ranch · Silverleaf · Troon North · Estancia · McCormick Ranch · Gainey Ranch · Old Town Scottsdale · Grayhawk

Drywall Installation & Repair FAQs for Scottsdale Homeowners

Ready to Start Your Scottsdale Drywall Installation & Repair Project?

Get a free, no-obligation estimate from a licensed Arizona contractor — ROC #349454.