
Drywall Installation & Repair in Surprise, AZ

Drywall hang, tape, and texture across Surprise — Sun City Grand to Marley Park.

Serving Surprise & nearby Maricopa County

Get Your Free Drywall Installation & Repair Estimate

Step 1 of 5Project

What kind of project?

Pick the option that fits best — you can add details next.

Quick Answer: Drywall Installation & Repair in Surprise

ProWorx Restoration provides drywall installation across Surprise, AZ — popcorn removal, knockdown re-texture, Sun City Grand accessibility drywall, garage conversions, and water/fire patch work in Marley Park, Asante, and Sterling Grove. Typical projects run $1,400–$18,000 and 2–13 days.

1,200+

Projects Completed

15+

Years Experience

ROC #349454

Licensed & Insured

100%

Satisfaction Guaranteed

Drywall Installation & Repair Built for Surprise Homes
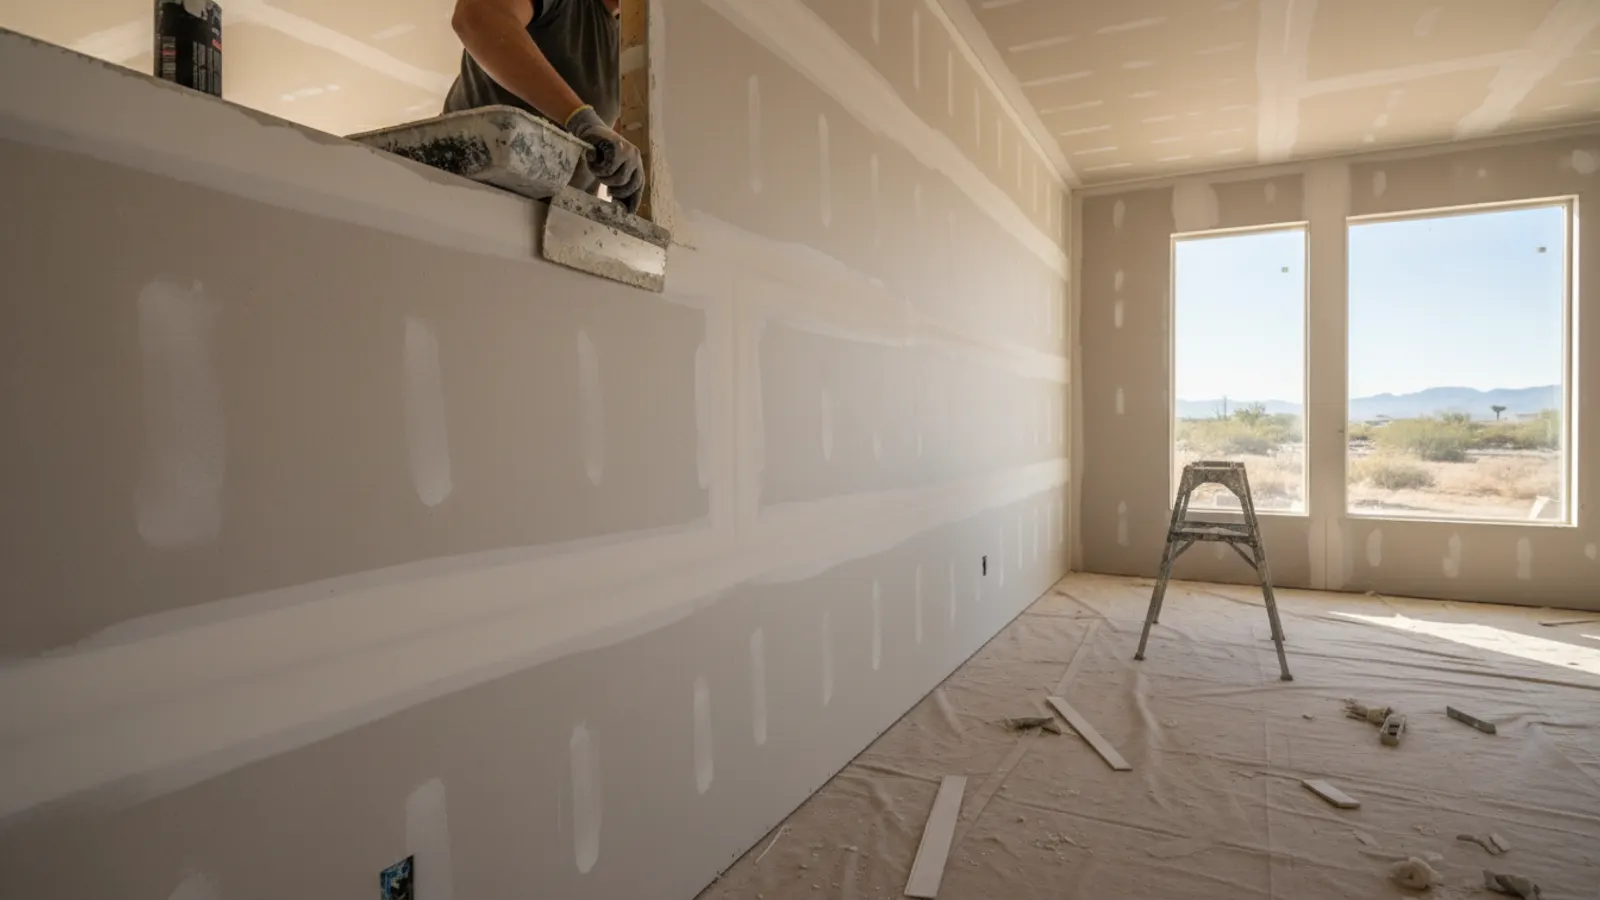
Drywall being hung and joint compound smoothed across the seams in a Surprise, Arizona home
Surprise's active-adult communities (Sun City Grand, Sun Village, Arizona Traditions) drive the highest-volume scope: popcorn removal, accessibility blocking (grab bars, curbless thresholds), and slab-leak patch work. We coordinate HOA quiet hours and architectural review on every job.
Marley Park TND interiors call for Level 5 smooth-finish on architecturally-styled walls; Asante and Sterling Grove drive standard knockdown remodel patch.
Insurance patch work (slab leak, drain backup, kitchen fire) is scoped in Xactimate with direct carrier billing.

Why Surprise Drywall Installation & Repair Is Different

Sun City Grand / Sun Village HOA coordination on every age-restricted job — quiet hours, dumpster placement, ARC approval.
City of Surprise Community Development permits interior remodels in 2–3 weeks.

Recent Drywall Installation & Repair Projects in Surprise

Sun City Grand

Slab leak water patch + accessibility blocking (grab bars, curbless), 6 rooms, knockdown match

$8.4K6 days

Marley Park

TND great-room Level 5 smooth-finish skim, 950 sq ft, prime + paint

$10K7 days

Sterling Grove

Garage gym conversion: frame, insulate, hang 5/8″, tape, texture, paint

$9.6K7 days

Drywall Installation & Repair in Surprise: Fast Facts

Active-adult community work: ~50% of Surprise volume.

Popcorn removal + accessibility blocking: ~30%.

Marley Park Level 5 smooth-finish: standard on TND interiors.

Average Surprise drywall project: $2,200–$13,000.

Asbestos pre-test on every pre-1980 popcorn scrape.

Typical Cost

$300 – $8,000+

Typical Timeline

1 day – 2 weeks

Permit Lead Time

2–4 weeks

How We Approach Drywall Installation & Repair

ProWorx Restoration installs and repairs drywall on new construction, additions, remodels, and damage restoration across the Phoenix metro. We hang, tape, float, prime, and texture — orange-peel, knockdown, skip-trowel, smooth, or custom — and match existing finishes invisibly in raking light. Arizona ROC #349454.
Two Phoenix-metro realities drive most drywall work. First, texture matching: orange-peel and knockdown are the dominant tract-home textures and they must be reproduced with calibrated air-driven texture guns, not roller-stipple or aerosol cans, or the patch shows forever. Second, moisture: monsoon ceiling leaks, slab leaks, AC condensate failures, and bathroom over-spray all damage drywall paper face, requiring full-sheet replacement once moisture migrates past the paper.

New drywall installation: 1/2" walls, 5/8" Type X ceilings and garage assemblies

Repair and patch from small holes to full-sheet replacement

Texture matching: orange-peel, knockdown, skip-trowel, smooth, Santa Fe

Level 4 finish standard; Level 5 skim coat for critical lighting and gloss paints

Water-damaged drywall removal, mold-safe handling, and seamless replacement

Moisture- and mold-resistant board (purple board) in wet areas

What Surprise Homeowners Should Know About Drywall Installation & Repair

Painting New Drywall

New drywall must be primed before painting, because the paper surface and joint compound absorb paint differently. Without primer, the finished wall may show uneven sheen or visible seams. A quality primer creates a uniform surface so the topcoat looks consistent.

The Restoration Sequence

Interior restoration follows a logical order to avoid damaging finished work. Structural and system repairs come first, followed by walls and ceilings, then cabinetry and trim, then flooring and painting, and finally fixtures and hardware. Coordinating the sequence protects completed surfaces and keeps the project efficient.

Sound Control

Additional insulation, resilient channels, specialised sound-dampening drywall and careful sealing can reduce noise transmission between rooms. These options are useful for bedrooms, home offices and media rooms.

Interior Restoration for Rental Properties

Rental properties often need interior restoration between tenants. Repairing wall damage, refinishing floors, repainting and updating worn fixtures prepares the unit for new occupants quickly. Durable finishes chosen during restoration reduce future turnover costs.

Materials & Standards We Use

Installation per GA-216 (Gypsum Association Application & Finishing). Sheet sizes: 1/2" regular for walls, 5/8" Type X for ceilings and garage walls per IRC fire requirements. Joint compound: setting-type for first two coats, lightweight all-purpose for finish coat. Tape: paper for tapered joints, fiberglass mesh only on small patches. Finish levels per GA-214 — Level 4 standard, Level 5 skim coat for areas with critical light or semi-gloss/gloss paint. All work warrantied under ROC #349454.

Corner Bead

Outside corners are protected with corner bead, which creates a straight edge and resists impact damage. Damaged or dented corner bead can be replaced or repaired to restore a clean edge.

Patching Holes and Damage

Small holes from nails or minor impacts can be filled and sanded, while larger holes require a drywall patch secured to backing or framing. Proper patching techniques ensure repairs are strong and invisible after texturing and painting.

Restoring Trim and Millwork

Original baseboards, door casings, crown moulding and built-ins contribute greatly to a home's character. Damaged sections can often be repaired, and missing pieces can be custom milled to match existing profiles. Preserving original millwork maintains the home's authenticity and is often preferable to replacing it with modern alternatives.

Cabinet and Built-In Repair

Cabinets and built-ins damaged by water, wear or age can frequently be repaired rather than replaced. Swollen panels, loose joints, damaged finishes and worn hardware can be restored, and refinishing can refresh their appearance. Repairing quality built-ins preserves craftsmanship that would be expensive to replicate.

Restoring Ceilings

Ceilings can suffer from water stains, cracks, sagging and damaged texture. Repairs range from stain-blocking primer and repainting to replacing damaged sections and matching texture. In older homes, ceiling texture may need testing for asbestos before it is disturbed. Restoring ceilings properly ensures repairs are invisible and the room looks complete.

Installing Drywall on Ceilings

Ceiling drywall is heavier and more difficult to install than wall drywall, and it is more prone to sagging over time if fastened incorrectly. Using the correct thickness, fastener spacing and framing support ensures ceilings remain flat. Ceilings are typically hung before walls so wall panels support the ceiling edges, creating stronger corners.

Choosing the Right Drywall

Drywall comes in different types for different locations. Standard drywall suits most walls and ceilings. Moisture-resistant board is used in areas exposed to humidity, though tile in wet areas requires a proper tile backer. Fire-resistant drywall is used where codes require fire separation, such as between an attached garage and living spaces. Choosing the right type ensures safety and performance.

Drywall After Water Damage

Drywall that has been soaked by water often loses strength and may support mould growth. Saturated drywall is usually cut out and replaced after the wall cavity has been dried. Replacing damaged sections promptly prevents further deterioration.

Common Interior Restoration Issues in Phoenix-Metro Homes

Texture matching is the single most-failed item on amateur restorations — Arizona's orange-peel and knockdown textures must be matched with the right gun, tip, and air pressure or the patch shows in raking light forever. Popcorn ceilings on pre-1980 homes need asbestos testing before scraping; positive results trigger Maricopa County / ADEQ abatement protocols. Smoke-damaged drywall requires shellac-based primer (BIN, Kilz Original) before topcoat or odor and staining bleed through latex paint within weeks. Water-stained ceilings need full replacement of affected sheetrock once moisture has migrated past the paper face.

How Our Drywall Installation & Repair Process Works in Surprise

01

Free On-Site Consultation

We visit your property, discuss your goals, and provide a detailed, no-obligation estimate.

02

Custom Project Plan

Our team creates a tailored project plan with timeline, materials, and transparent pricing.

03

Licensed Crews On Site

Licensed craftsmen complete your project with quality materials and meticulous attention to detail.

04

Final Walkthrough & Sign-Off

We inspect every detail with you and ensure complete satisfaction before the job is done.

"Slab leak in our Sun City Grand home — ProWorx handled the patch, grab-bar blocking, repaint, and the carrier scope without us lifting a finger."

ProWorx Client · Surprise

Neighborhoods We Serve in Surprise

Sun City Grand · Sun Village · Arizona Traditions · Marley Park · Asante · Sterling Grove · Greer Ranch · Surprise Farms

Drywall Installation & Repair FAQs for Surprise Homeowners

Ready to Start Your Surprise Drywall Installation & Repair Project?

Get a free, no-obligation estimate from a licensed Arizona contractor — ROC #349454.